

How To Install Bar Tape On A Road Bike
This commodity will address wrapping drop mode handlebars. For installation of flat handlebar grips run across Flat Bar Grip Installation.
1
Grooming
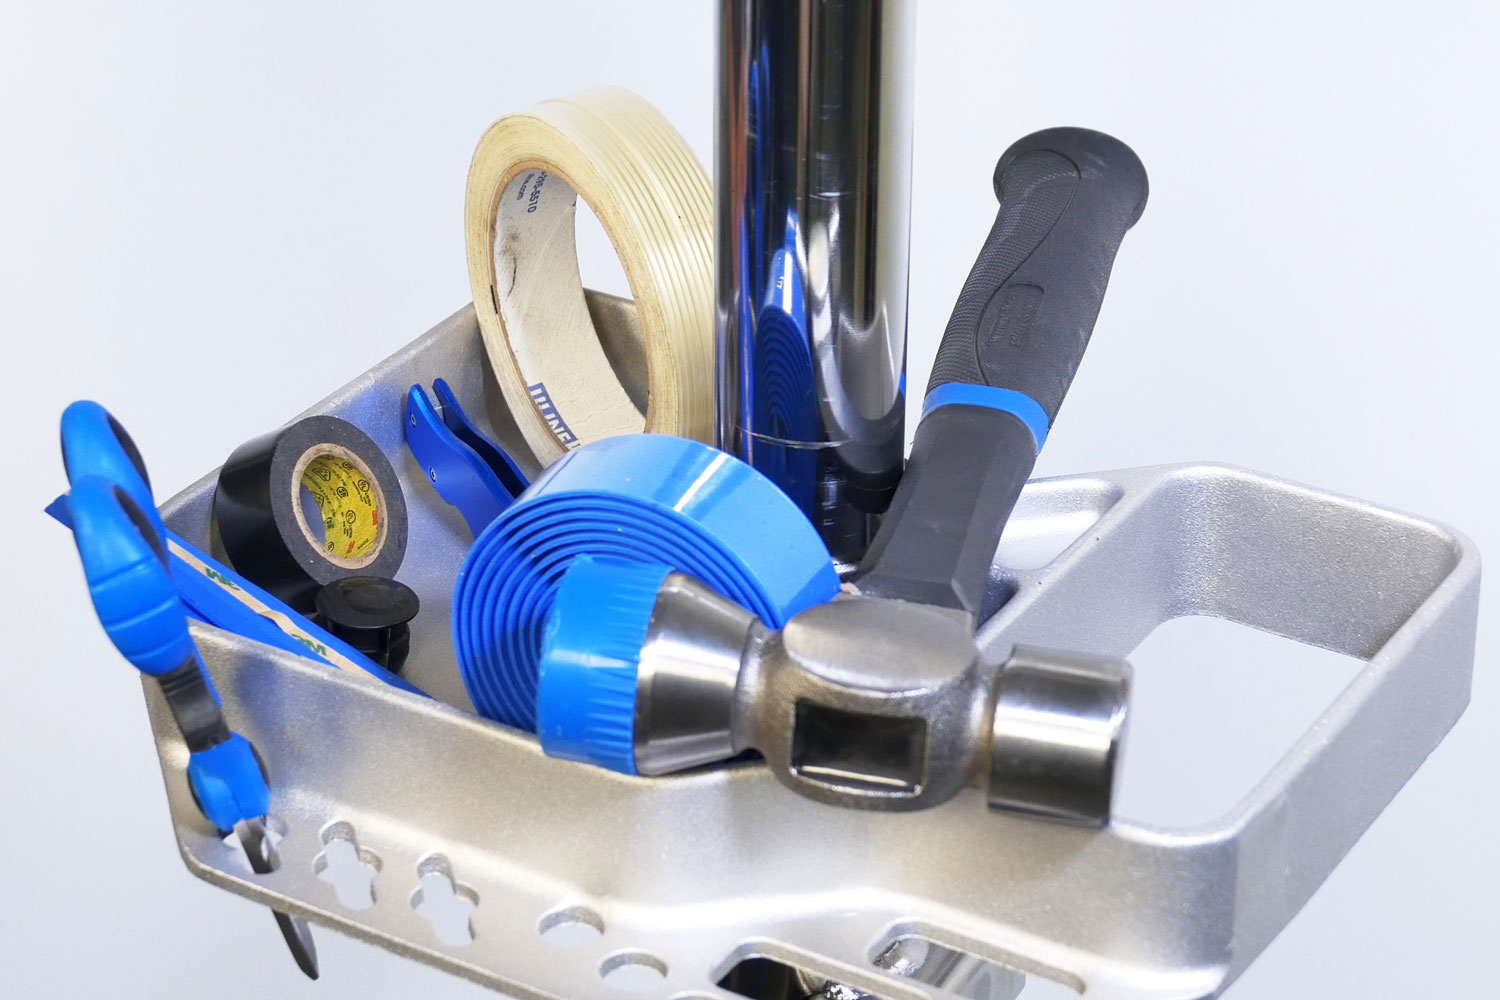
What Tools exercise I need?
- HBH-ii or HBH-3 Handlebar Holder (makes work easier)
- SZR-1 Scissors and precipitous pocketknife or razor blade such as United kingdom of great britain and northern ireland-i Utility Pocketknife
- Strapping tape or PVC tape to secure housing to bar
- PVC colored record for catastrophe wrap
Wrapping drop handlebars is a skill that requires exercise and patience. The finished job should wait tidy and clean for the user. Wrapping also provides a proficient time to replace cables and housing. Additionally, with the bar tape off, it is an opportune time to move the levers up or down the bars as desired. If you are using white or low-cal colored tape, wash hands thoroughly or wear MG-2 gloves to keep the tape make clean.
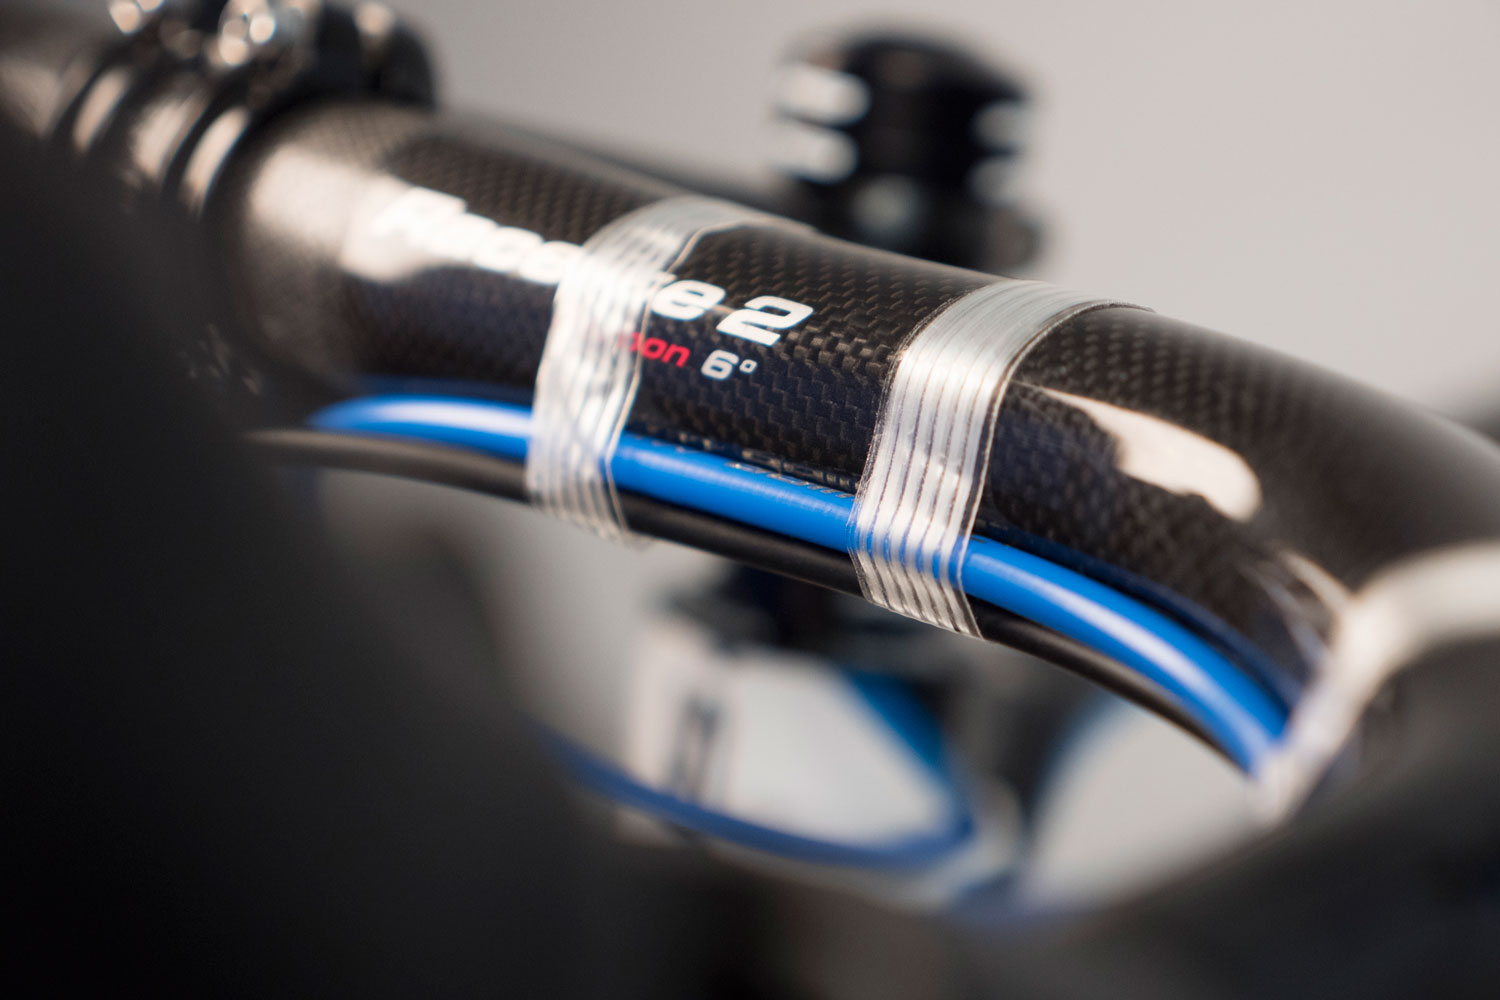
When re-wrapping confined, begin with an inspection. Adhesive padded tapes may leave lumps as they are removed, and these should be cleaned off. Housing and cables are ofttimes routed under the record. Employ thin agglutinative tape such as electrical tape or narrow strips of cobweb tape to agree the housing in identify.
Handlebar tape can be made of cloth, cork, padded vinyl or other synthetic materials. Tape brands volition vary both in how it stretches and in its strength when pulled in tension over the bar. If you are unfamiliar with the brand and blazon of record, grab at the end and pull on a short section to get a sense of the tensile strength. This may help prevent inadvertent breaking while in the centre of a wrap.
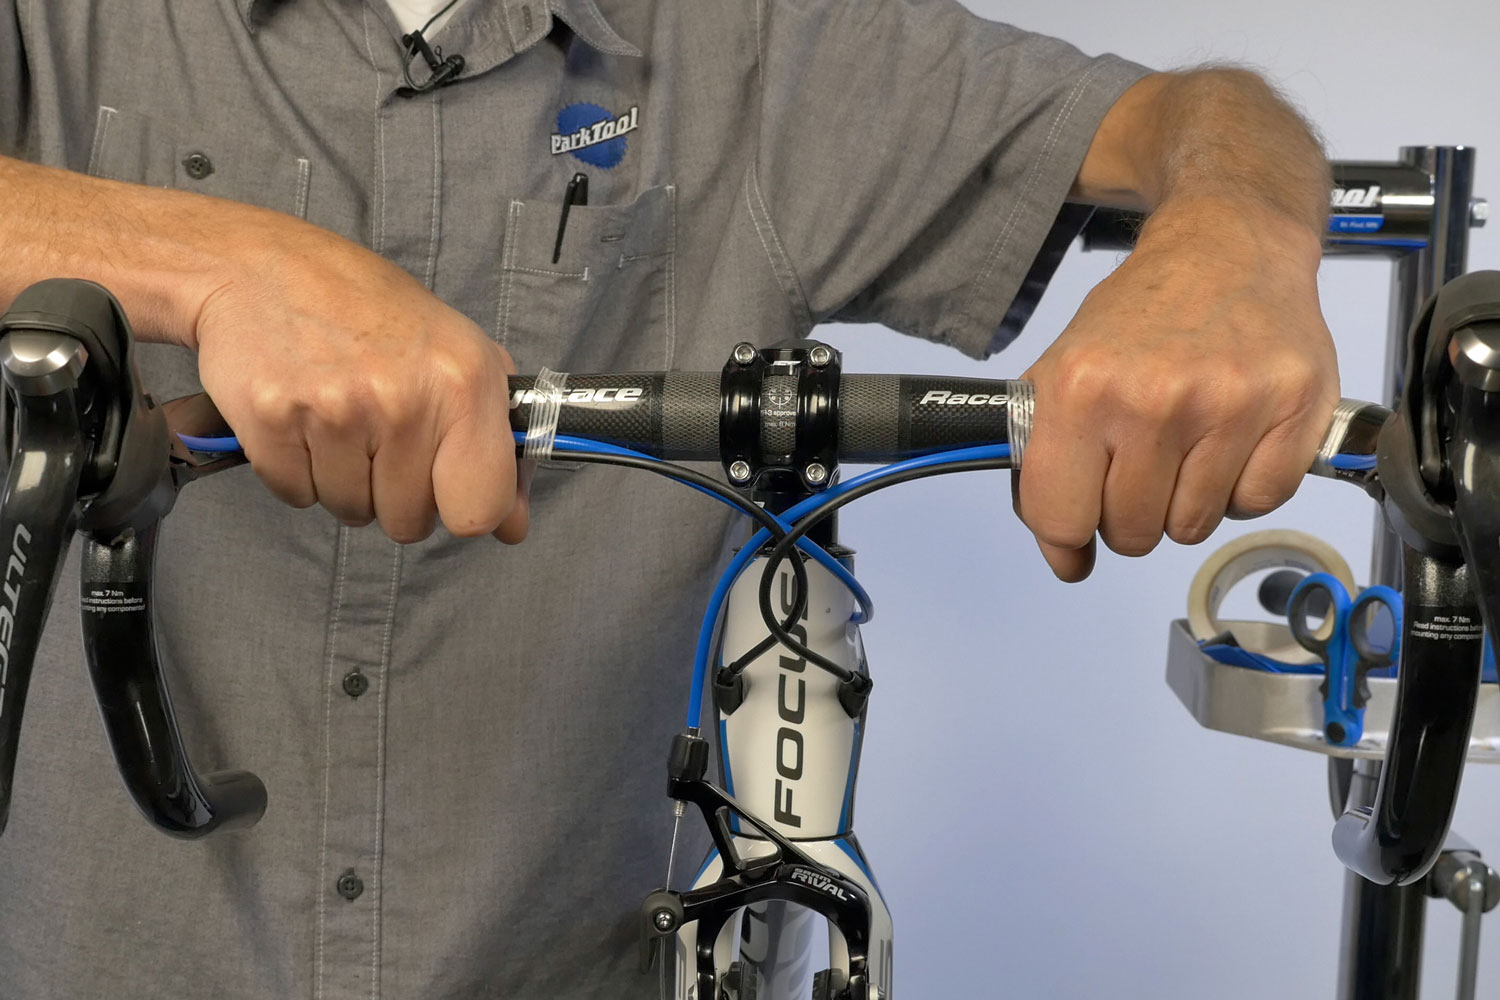
Arrange the work expanse so tools and parts are shut at hand. Besides the bar tape, you will need scissors or a precipitous knife, tape to hold the housing to the bars, finishing tape such every bit electrical record for the end and the bar finish plugs. Pre-cutting the finishing tape nigh eight to 10″ long (20 to 25cm) and stick the ends to the height tube. Lastly, pull back on each hood to expose the lever body.
Wrapping should begin at the end of the handle bars and work upward. Starting at the top of the bars and working downwards will result in rolling the border of the tape downwardly equally the user presses on it during riding.
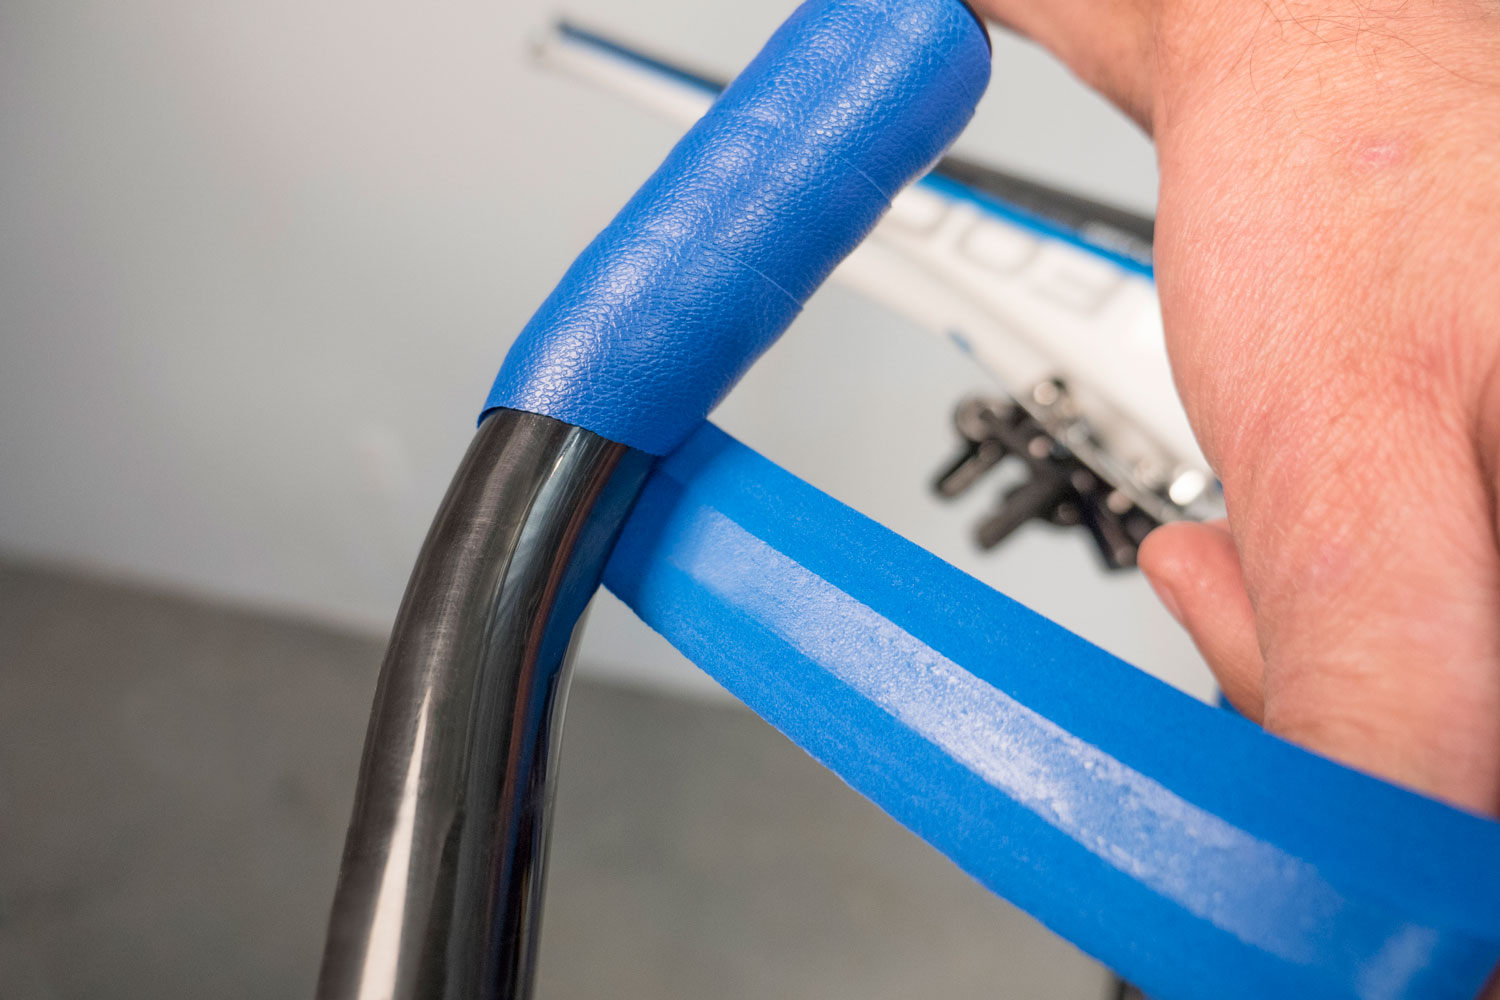
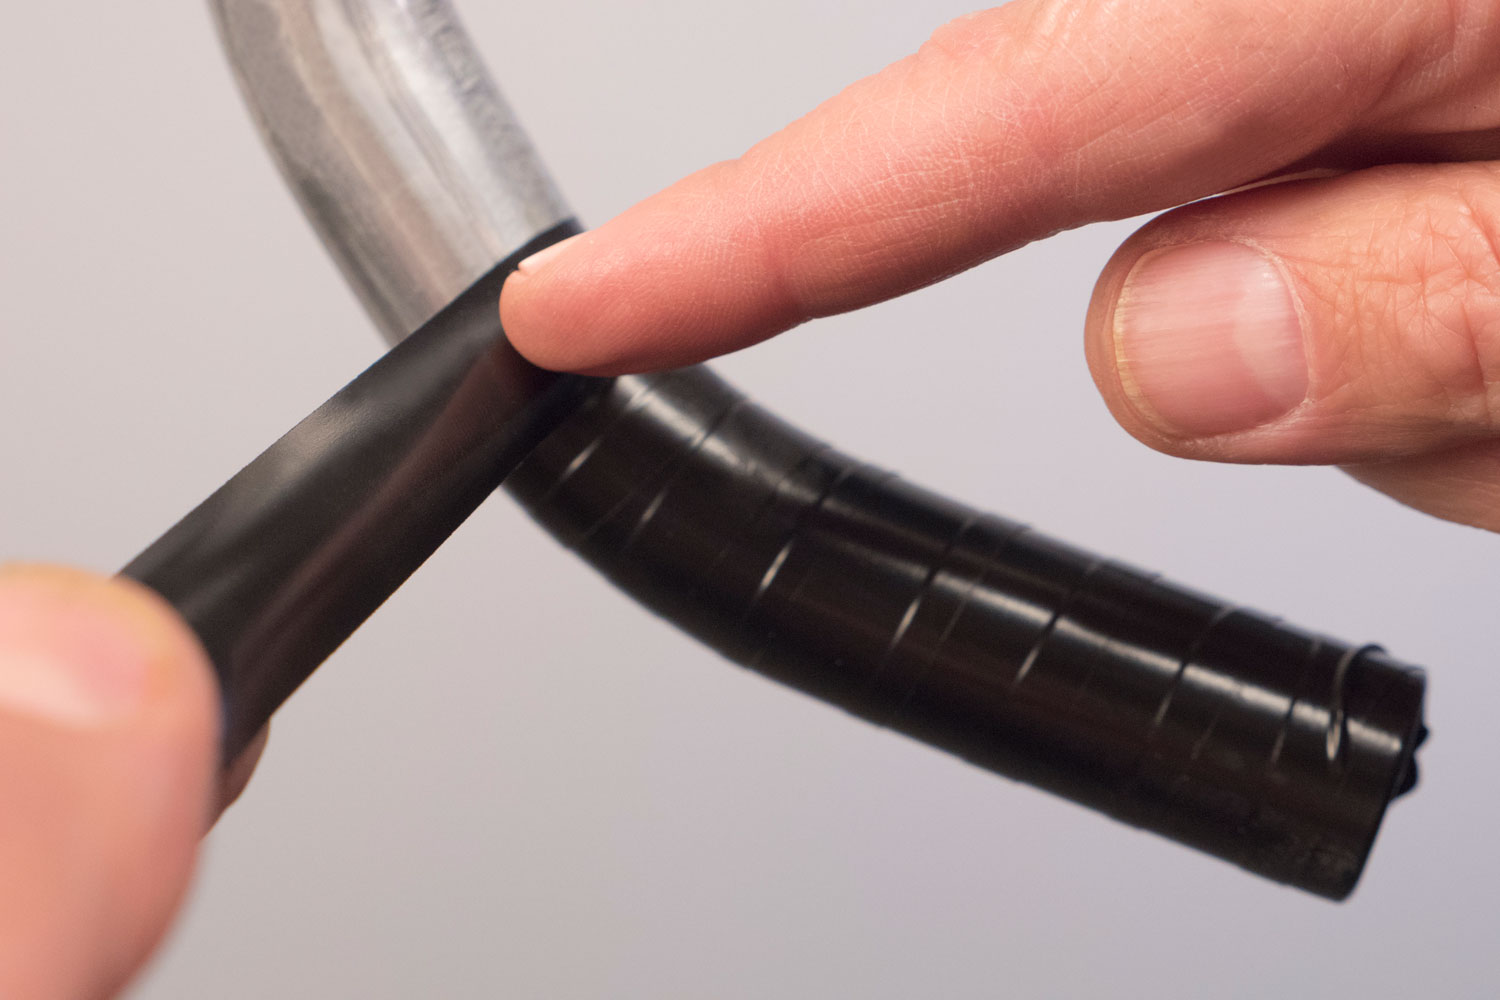
Earlier starting the wrap, consider where to cease the tape. Some handlebars are made with an obvious sleeve in the centre and this tin be used as end of the taping. Some bars have a long taper and lack a clear place to end. In these cases, decide where to end by how much tape is needed for comfort and past the look of the finished result.
2
Wrapping Process
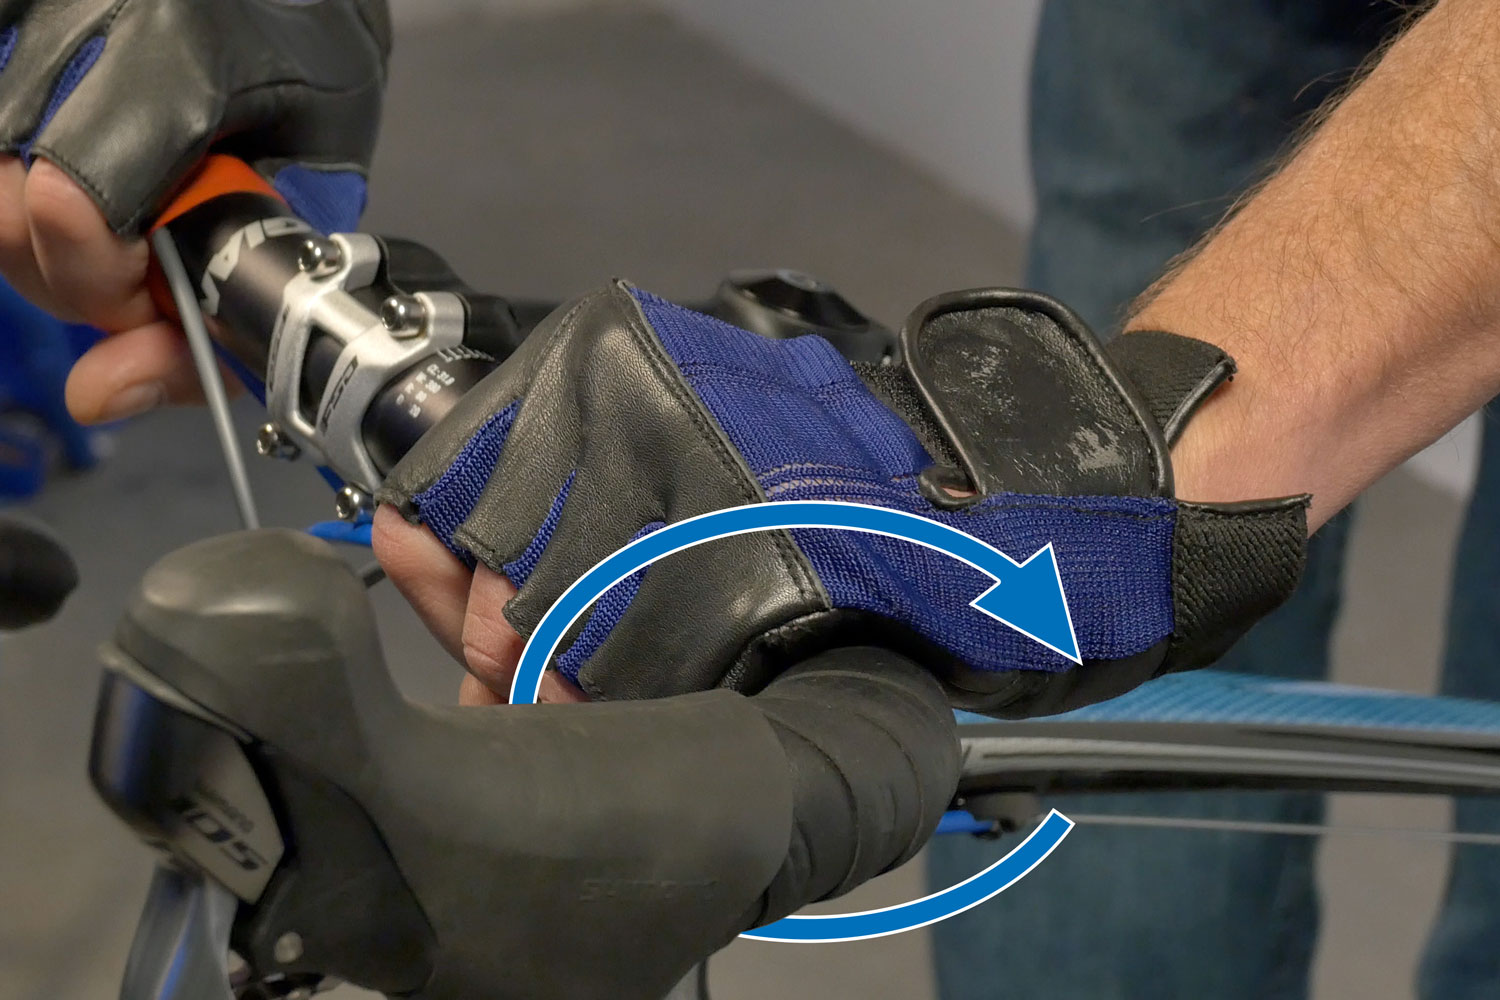
During stressful riding, the rider's hands tend to utilise a torque to the confined. Matching the direction of wrap helps minimize loosening of the tape. Equally seen from the back (the passenger's point of view), the stress is outward on each side of the drops. Consequently, the right side should be wrapped in a clockwise direction while the left side should exist counter-clockwise.
However, when riding on the tops of the confined, it is the habit of many cyclists to pull back on their easily while under stress. To match this torque, the direction of wrap will need to be reversed above the levers.
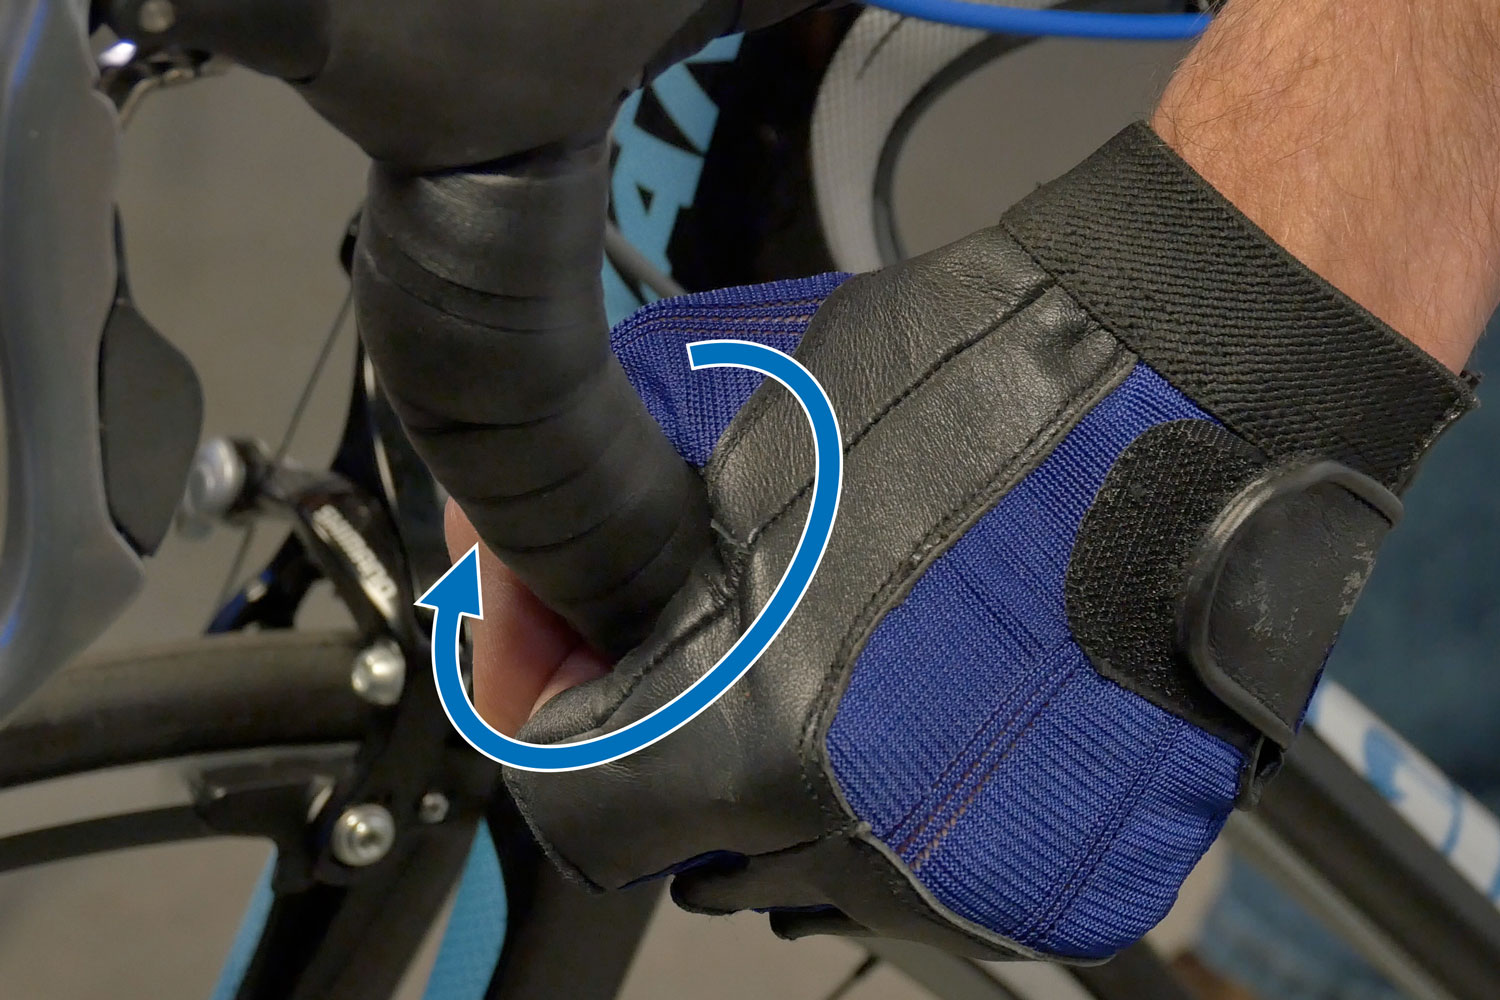
Outset the tape at the bottom side of the bar end. Extend one wrap past the end. Pull with tension and wrap iii or iv times as you move forward on the bar. Tuck the extra tape into the bar end and insert the bar end plug. Inspect that the plug is tight and the tape looks tidy. Right as needed before proceeding.

If the tape you lot are installing uses an adhesive strip, it will exist in the eye of the tape. Pull with tension and overlap as you proceed so the adhesive is on the bare handlebar merely past the previous wrap of tape. For non-adhesive tapes, overlap so approximately half the tape is on bar.
Go on to maintain tension on the tape past pulling equally yous wrap, using care not to apply too much force, breaking the record. Cloth record peculiarly may demand to be worked shine, pulling and backing upwardly until it lies down nicely on the bar, especially at the corners. Audit as y'all wrap and avert leaving a gap in the record.
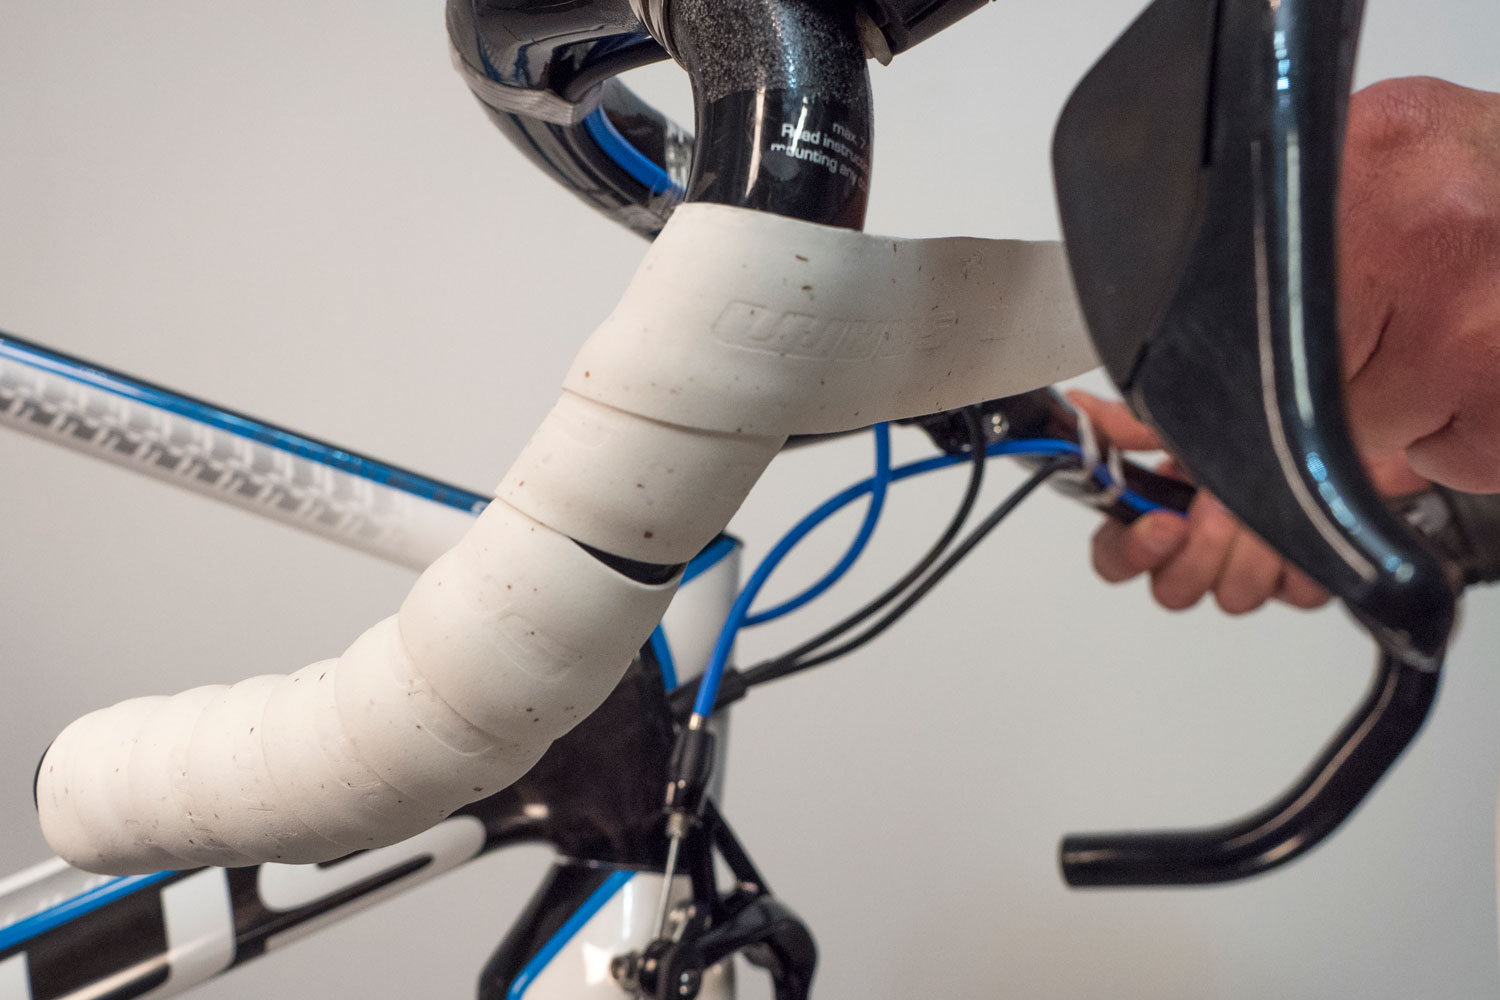
The tape wrap must pass the lever body. The simplest and easiest method at the brake levers is simply to extend the wrap every bit y'all achieve the torso. This leaves a small-scale visual gap in the wrap. Withal, this technique will outcome in a less desirable rotation direction of the wrap along the summit of the confined.
Alternatively, use the lever to reverse the management of wrap. By wrapping over the inside of the trunk, and then continuing up the bar, the tape is at present going the opposite rotation. Information technology will exist wrapped from front to back, matching the management of stress past the rider when on the top.
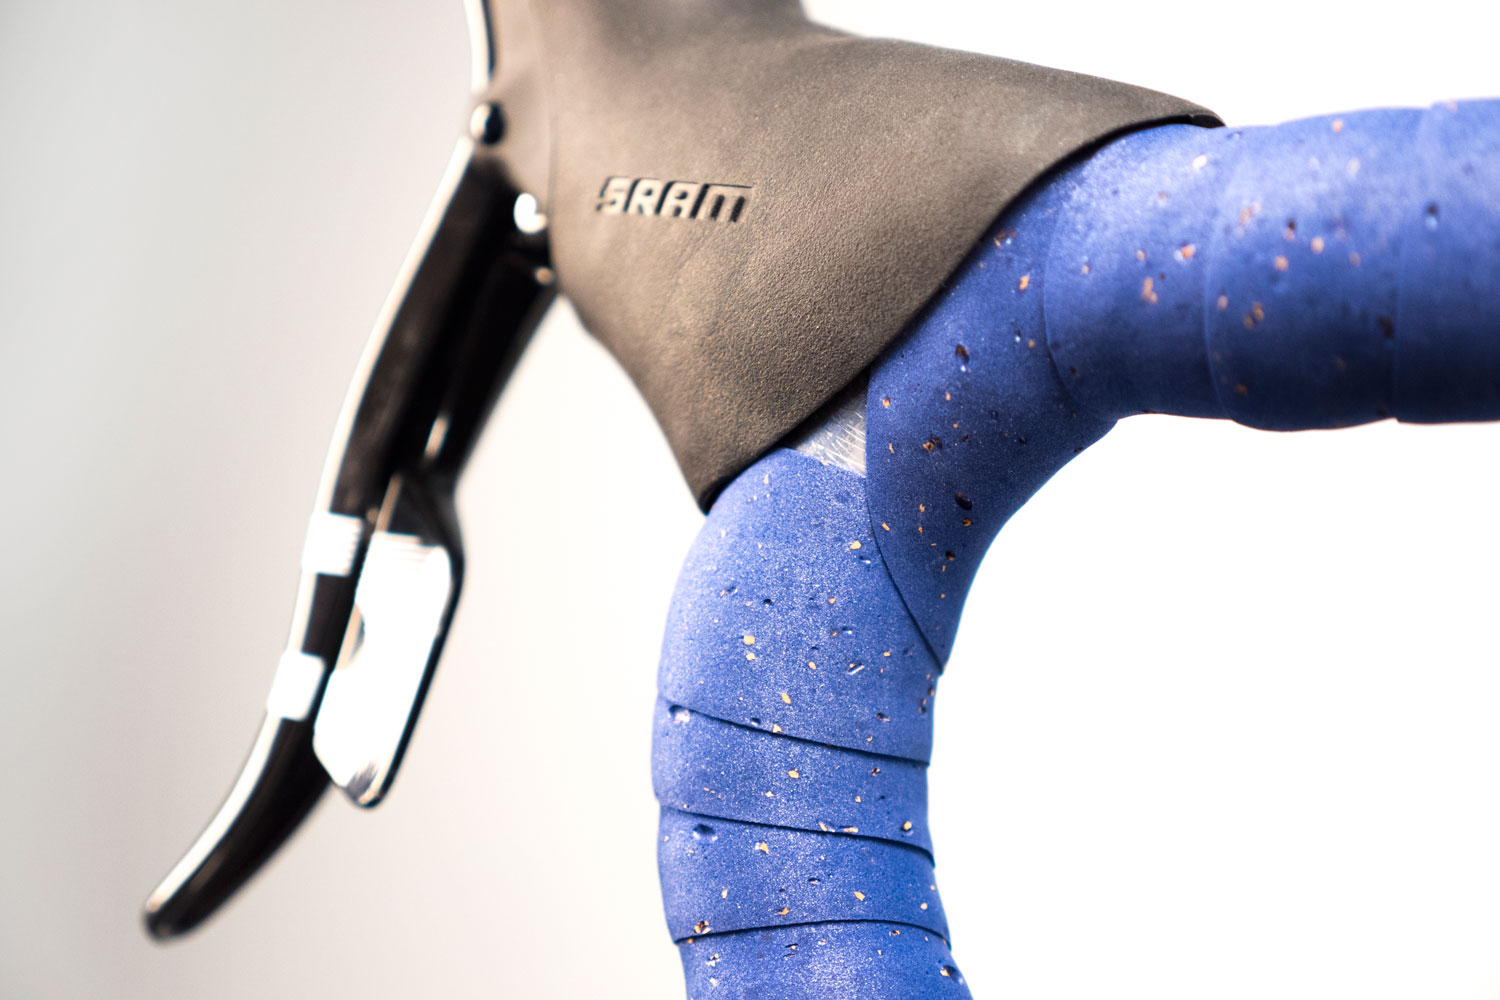
An additional technique is to use a minor slice of bar tape to embrace the bar at the lever strap. These extra pieces are sometimes included with the record. The hood should be pulled forward to expose the lever body. When the tape is shut to the trunk, identify the end-piece over the back of the lever.
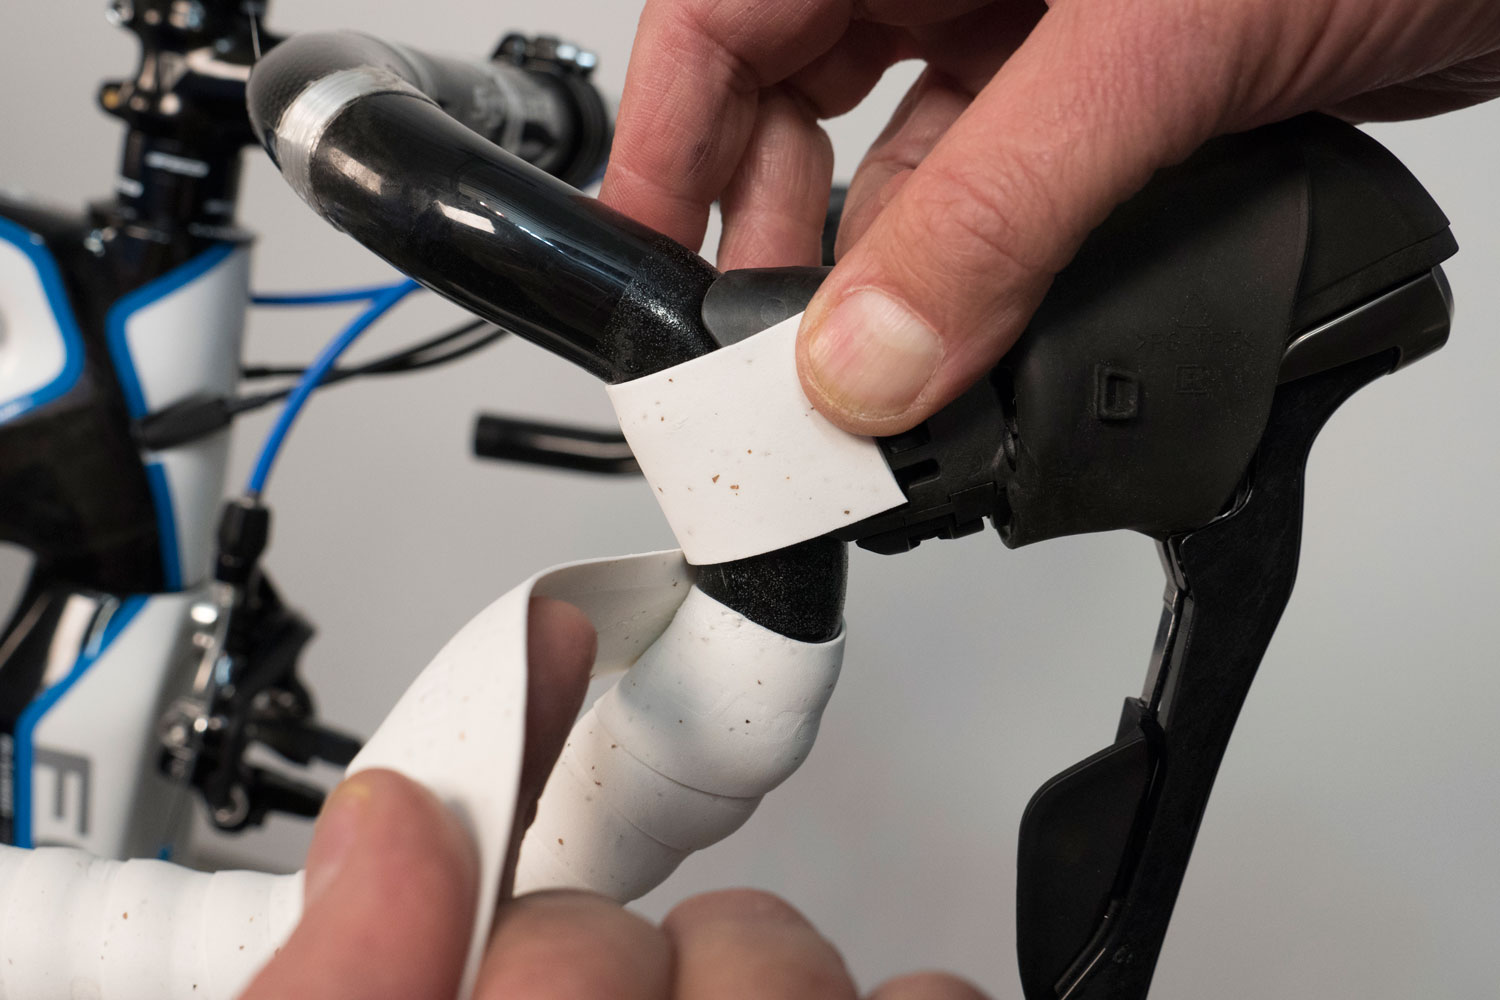
Proceed to wrap up and around the small piece and the lever, plus one or 2 additional wraps past the lever. Fold the hoods back and audit the tape for gaps. Correct any errors at present by unwrapping the record and working the area over again.
Even so another technique comes from a time when bar tape was relatively thin.The record is wrapped up and around the lever, so back below the lever, making a "figure viii." This extra wrapping will accept more than record length, and can leave a large bulbous mass at the lever.
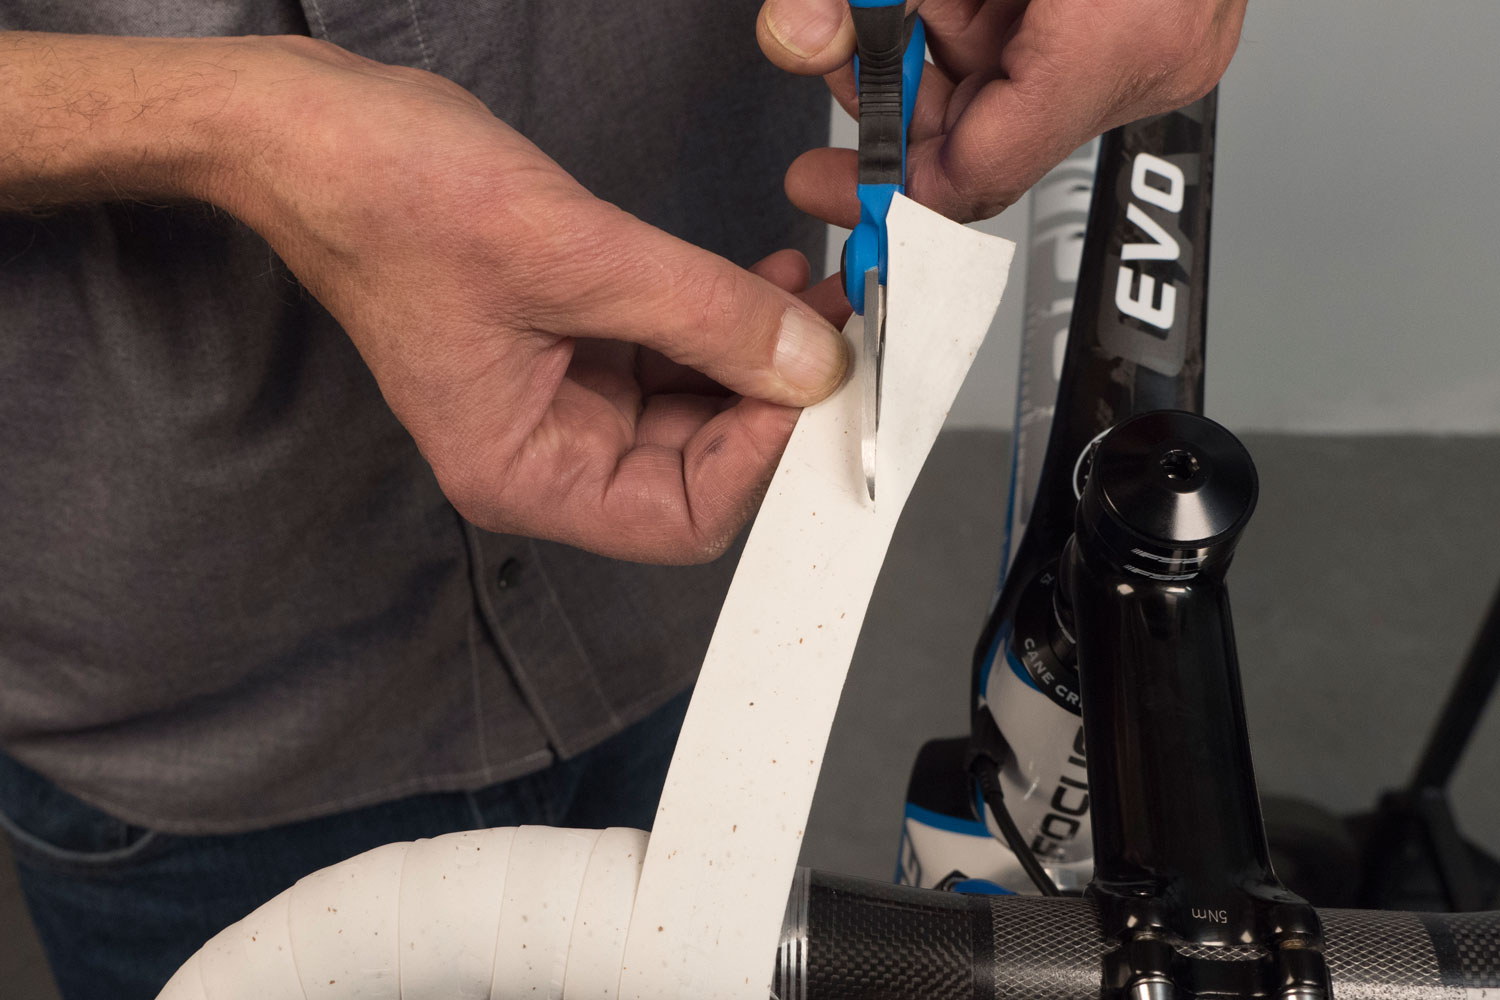
Keep wrapping toward the bar center. Maintain a consistent corporeality of wrap and wrap past your ending bespeak at least two wraps. Use scissors or a sharp knife held square to the bars and score or mark the tape along the line where it should be catastrophe.
NOTE: Use circumspection when working on carbon fiber handlebars. Exercise not make deep cuts into the fibers of carbon tubing.
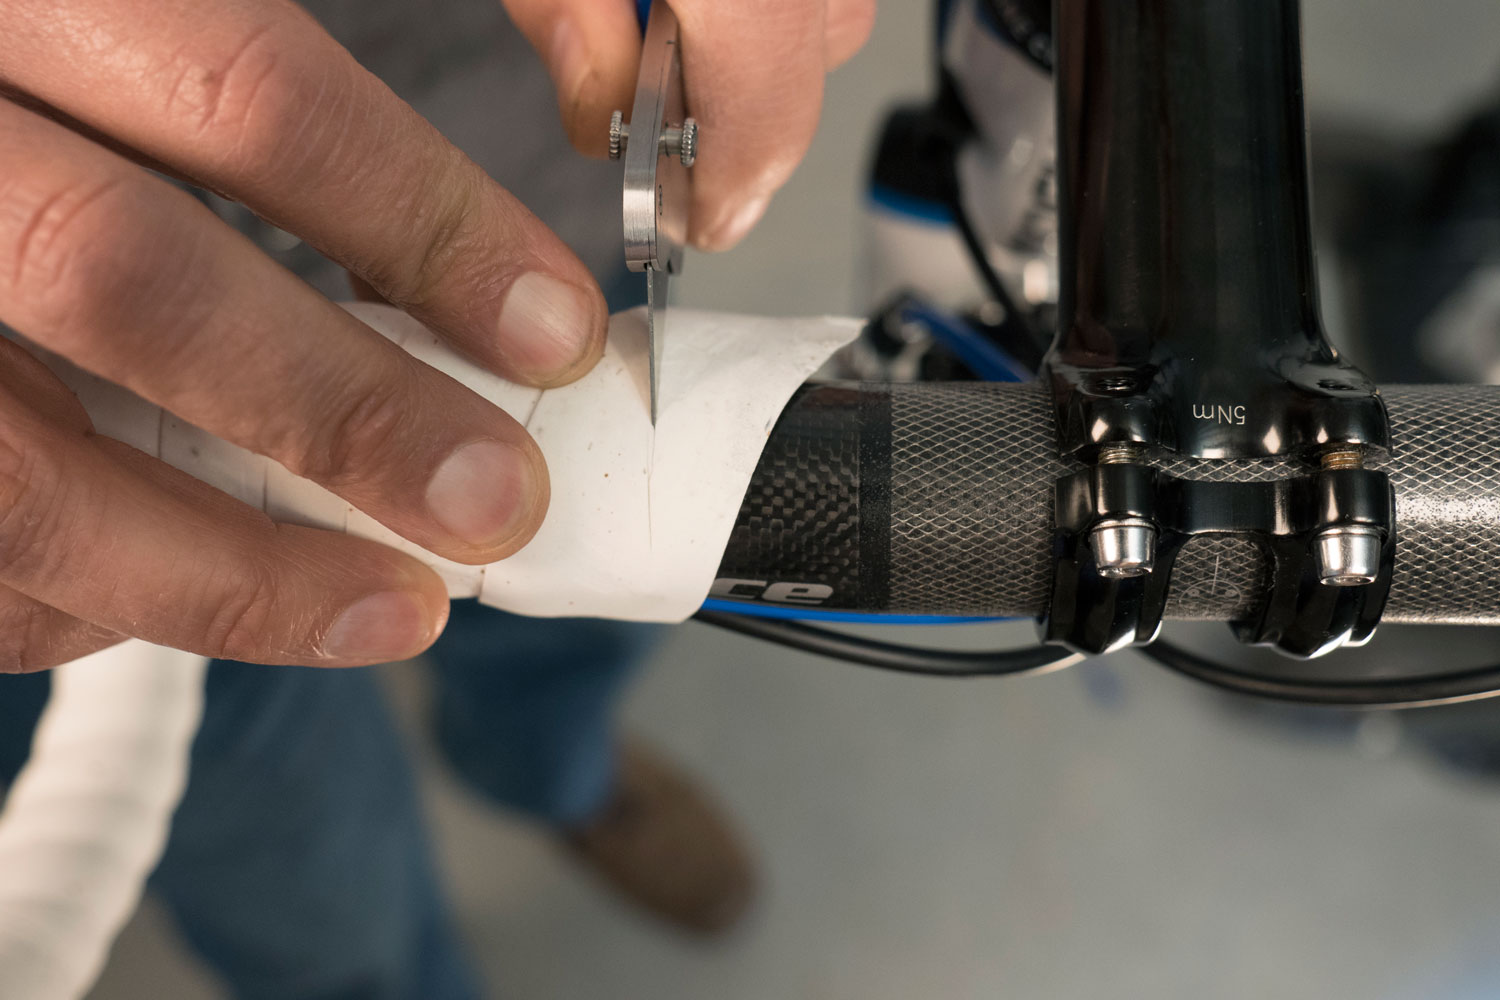
Back tape off 2 wraps and find your scoring or cutting mark. Use pair of scissors to extend the cut all the way through the tape. Maintain the line and angle shown by the cutting and cut record cleanly and evenly. Wrap the tape on to the bar once more. Trim the record end and so that it will finish at the lesser of the handlebar.
Utilise your piece of finishing tape to concord and cover the tape, wrapping in the same management as the tape. Start the finish tape at the bottom of the bar. Wrap with tension using care to maintain a straight wrap, laying the tape down without wrinkles. Wrap two or 3 times around the bar and cut end tape end so it will also end at the bottom of the bar.

Wrap the other bar as a mirror image. Remember—the starting direction on the lower drops should correspond to the direction of stress by the rider.
3
Additional Techniques
Here are some advanced techniques possible when wrapping a bar. Information technology is ofttimes necessary to practise unlike techniques and come across what works best for y'all and your client.
A useful technique—particularly for competitive cyclist—will assistance should the tape become torn or ripped, equally can happen in a crash. Use either a strong double-sided sticky tape (such as carpet tape), or to turn some electrician's record inside out for the lower few inches of the bar. This is the area where bar tape tend to get damaged from falls and chafe. Wrap over this with normal technique.
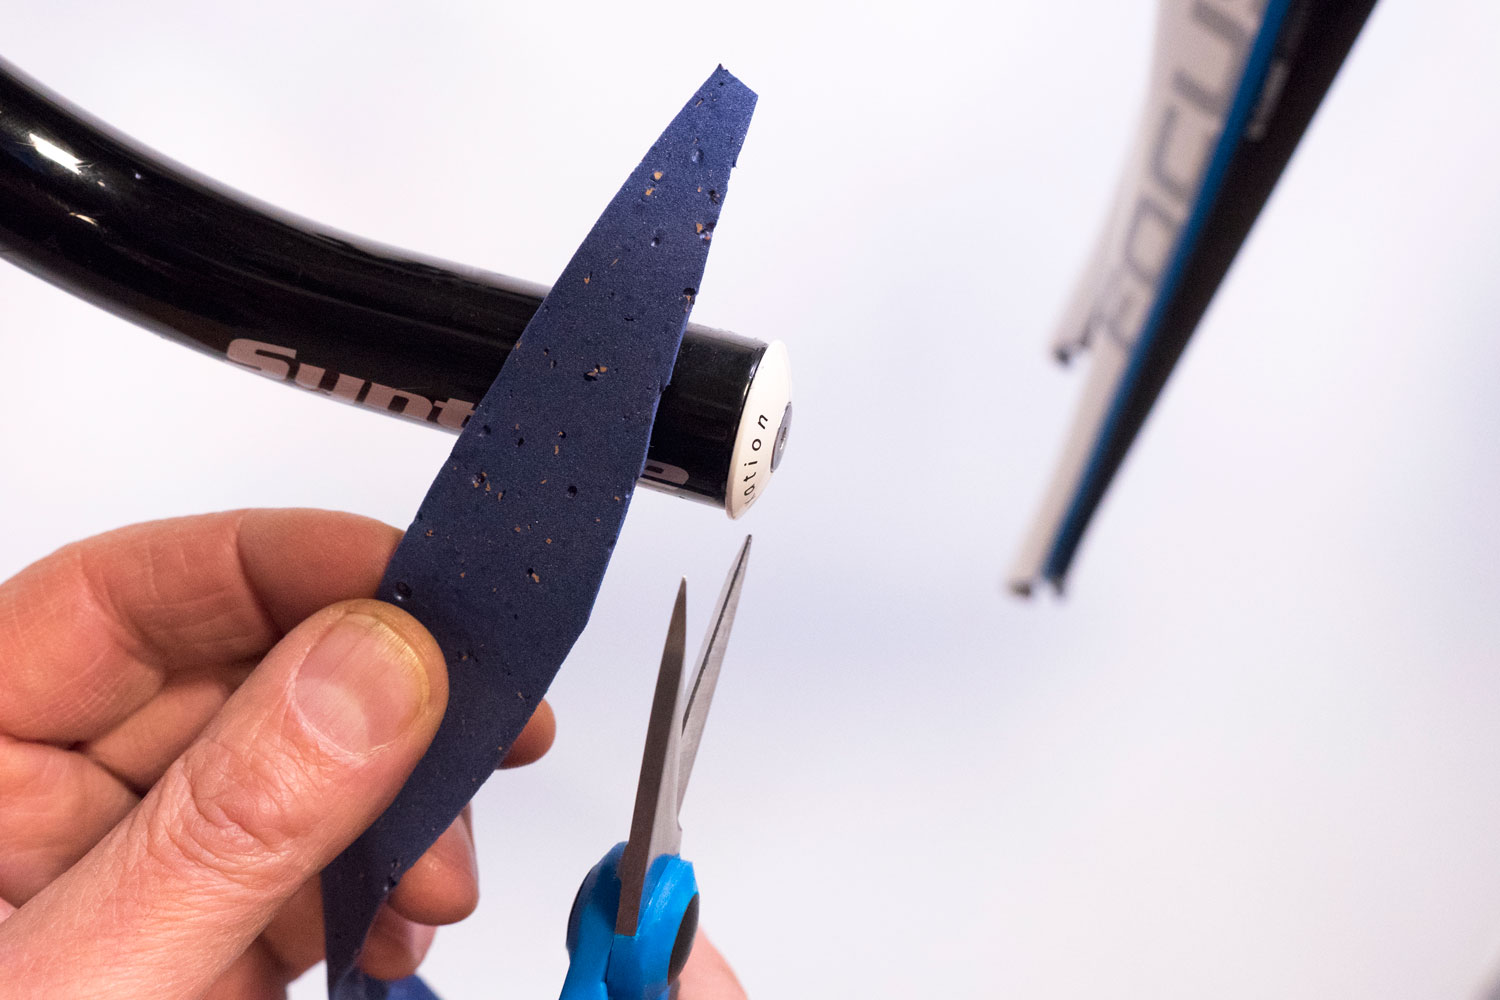
Some bar cease plugs expand within the ends to concord secure. It can make a cleaner tape beginning to first install these plugs, and then begin the wrap. Cut a taper at the terminate of tape. This allows the tape a shine and even offset, rather than a lump from the actress tape.
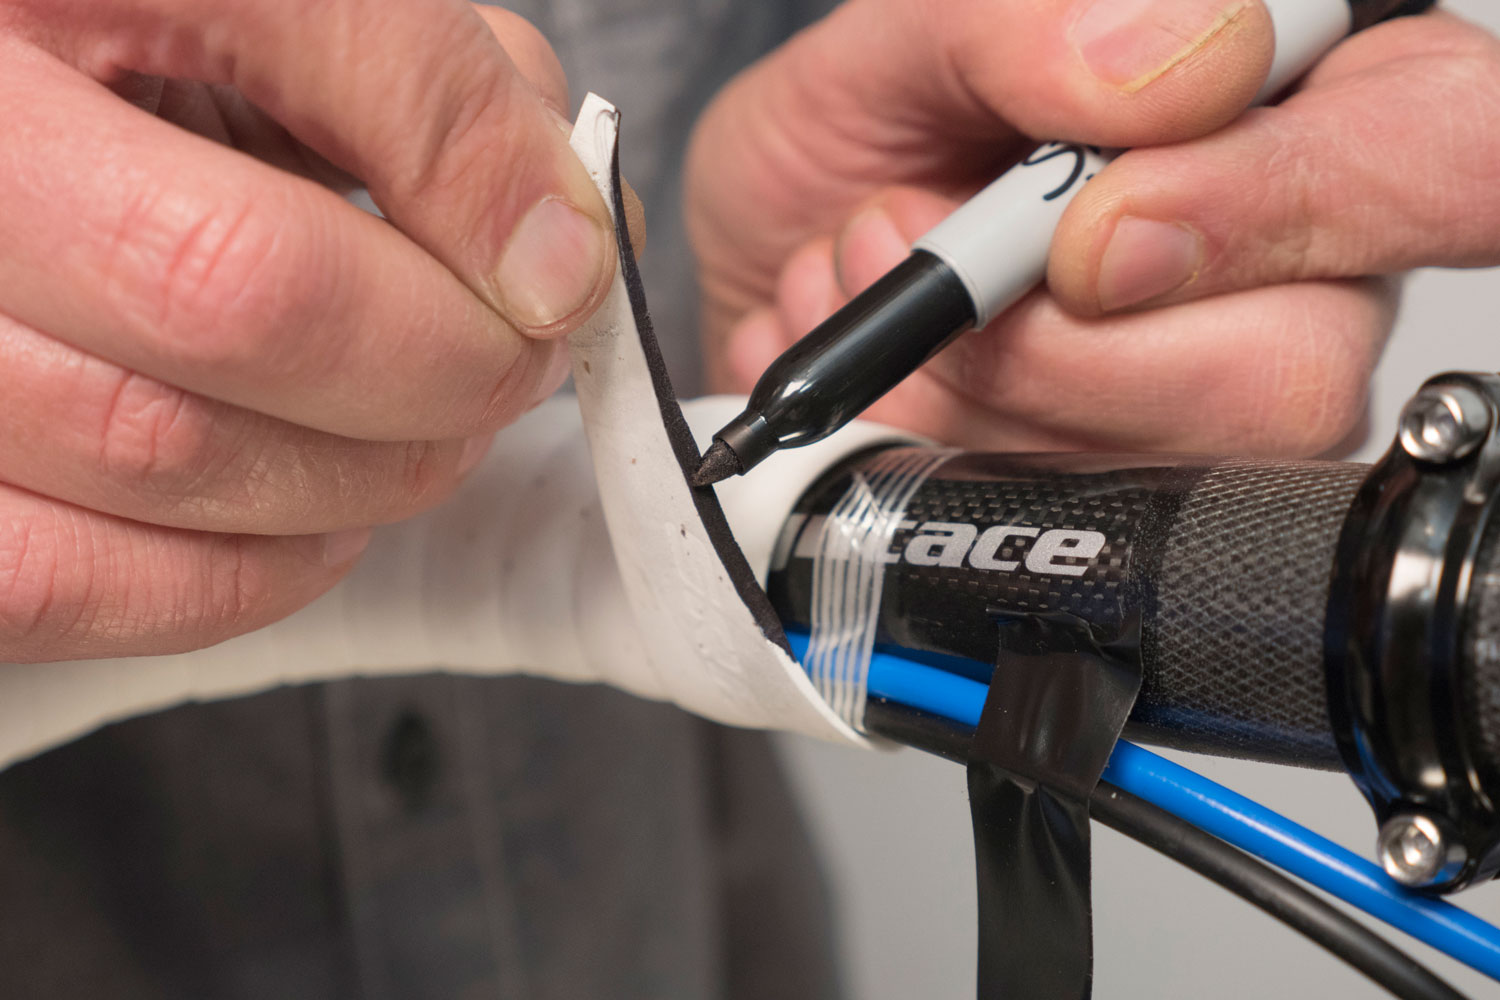
Using white tape when finishing with black electricians tape can exit a white border showing. Employ a black permanent marker to color the tape edge for a nicer await.
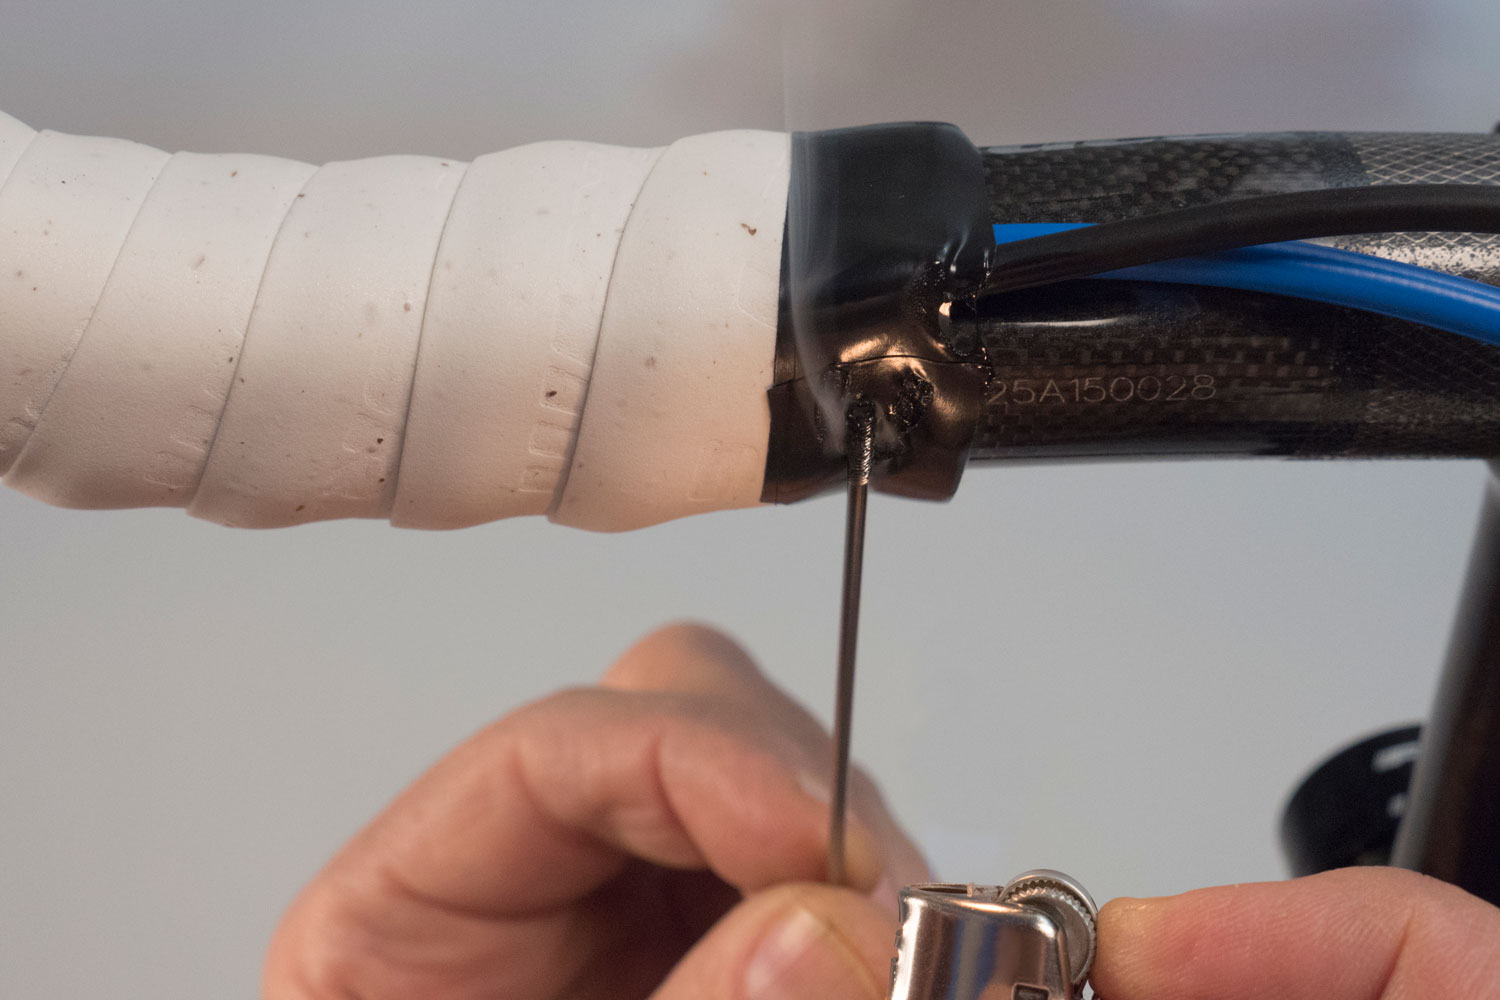
Finishing tape can, with fourth dimension, begin to pull upwards. Use a soldering iron or a heated spoke finish to "weld" the terminate tape to assist forestall loosening. But two or three "tacks" with heat under the bar where the tape is concluded is all that is needed.
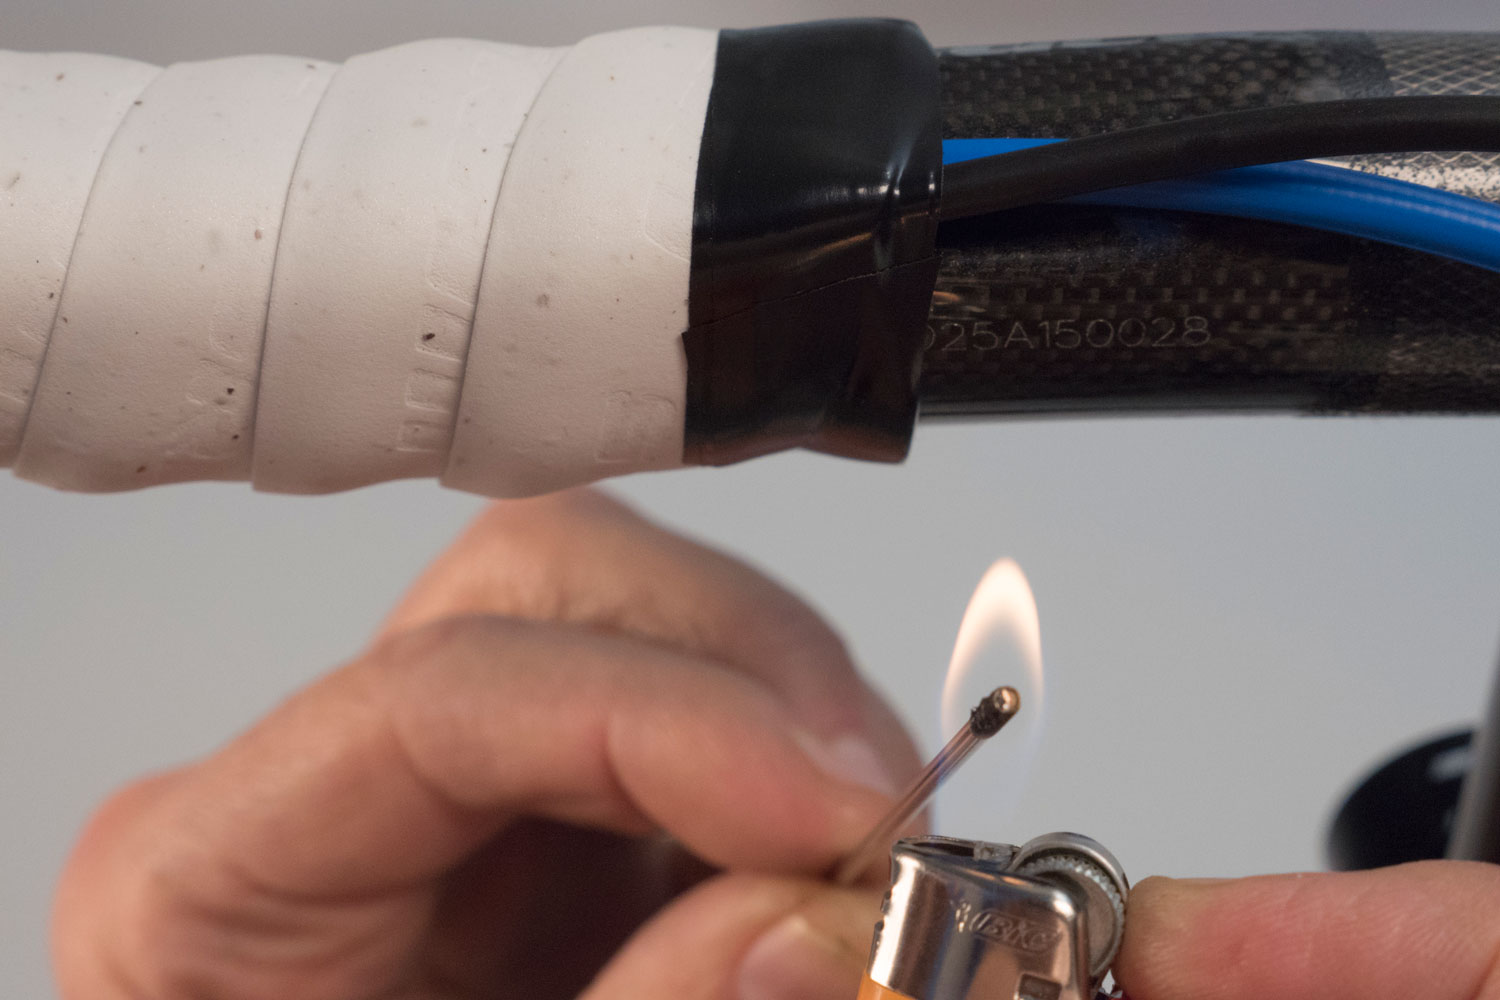
Tack weld the finishing to forestall loosening

Source: https://www.parktool.com/blog/repair-help/handlebar-tape-installation-drop-bars
Posted by: andersonthumbeth1938.blogspot.com
0 Response to "How To Install Bar Tape On A Road Bike"
Post a Comment